Kawasaki Ninja ZX Forum banner

Project: Suspension Upgrade

1 reading
75K views 199 replies 28 participants last post by  Pyke13  
#1 · (Edited)
ZX10R suspension upgrade, to be precise.

So I’ve been considering a suspension upgrade for some time. The 7r suspension seems to pale in comparison to the performance of the newer bikes, if not in performance, then at least in adjustability.

Two winters ago I completely rebuilt both of my front forks only to find that one now has a slow leak (probably due to me attempt to install the seal without the proper tools. Lesson learned.) I also need new tires.
Rather than purchase the parts to replace that same seal again, and spoon new Q2s onto my 7r wheels, I’ve decided that if an upgrade is to take place, it may as well happen now.

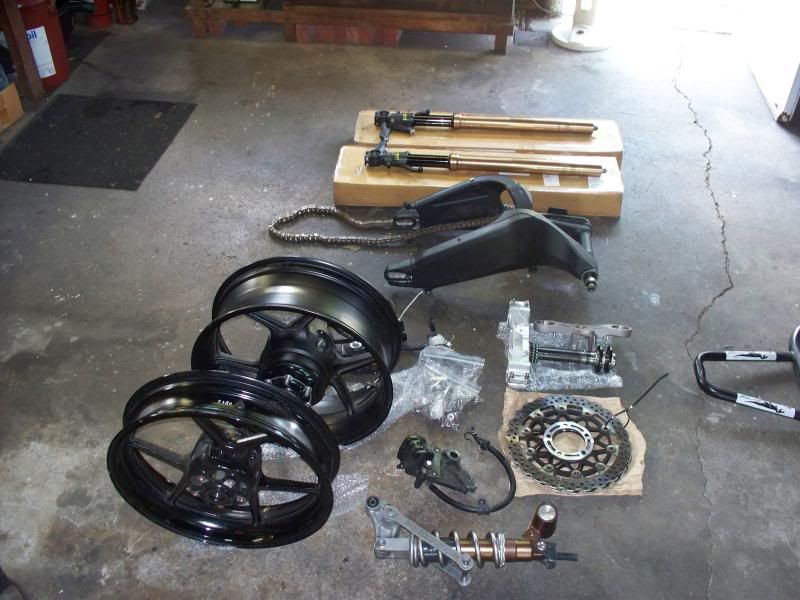
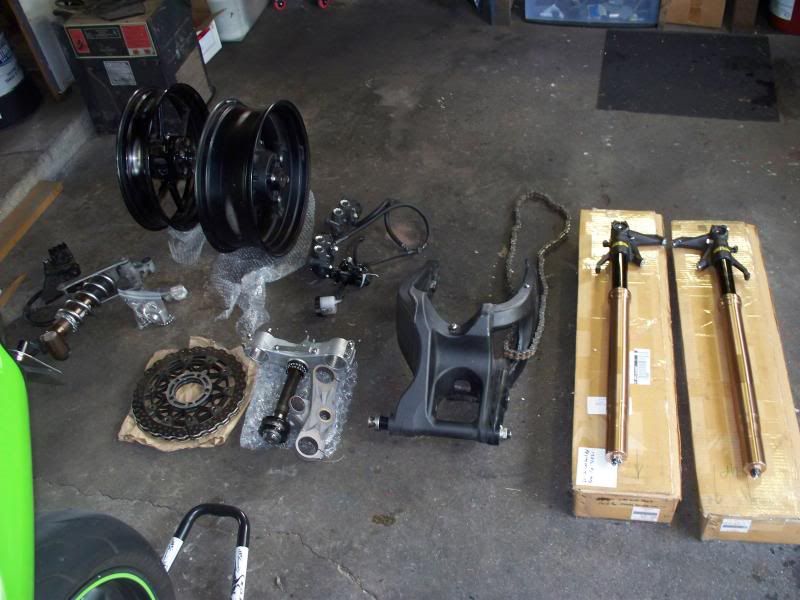
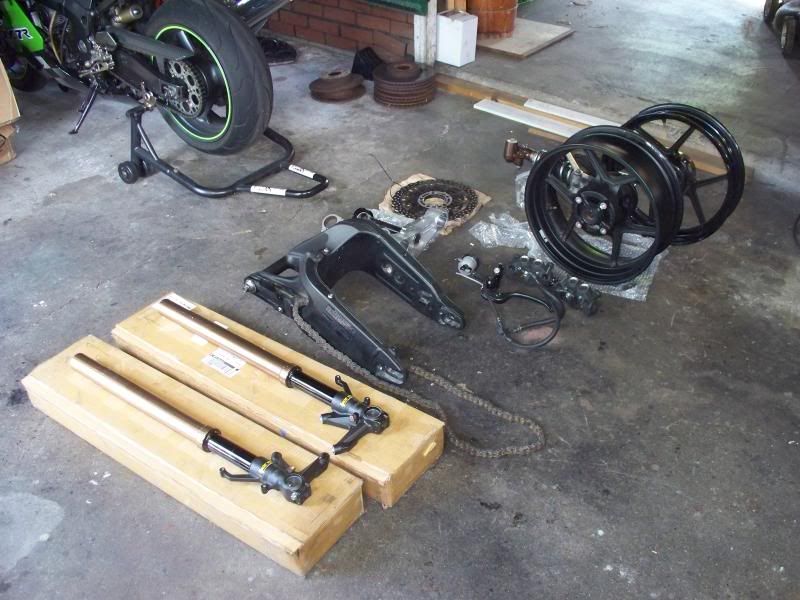
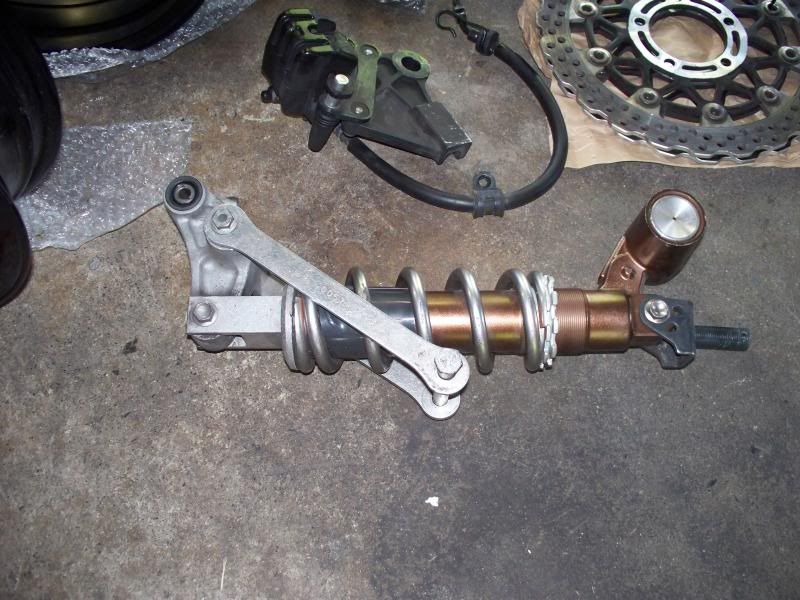
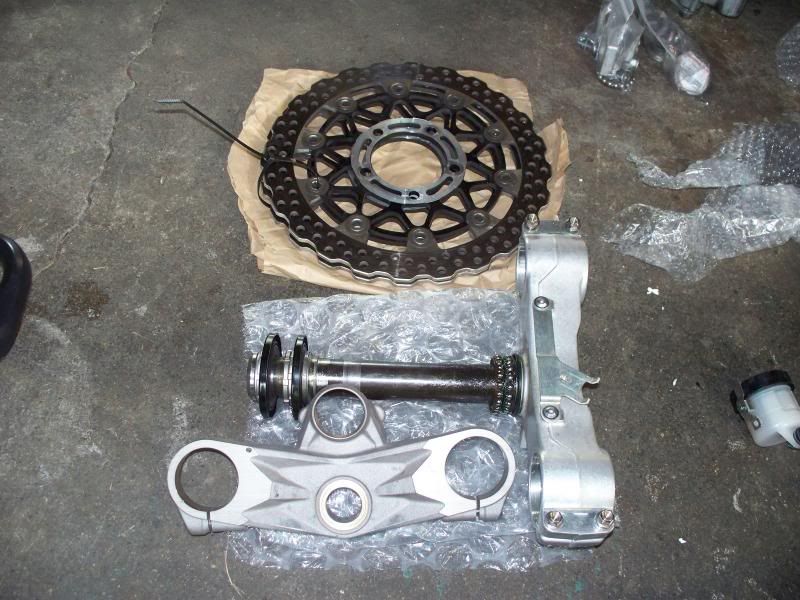
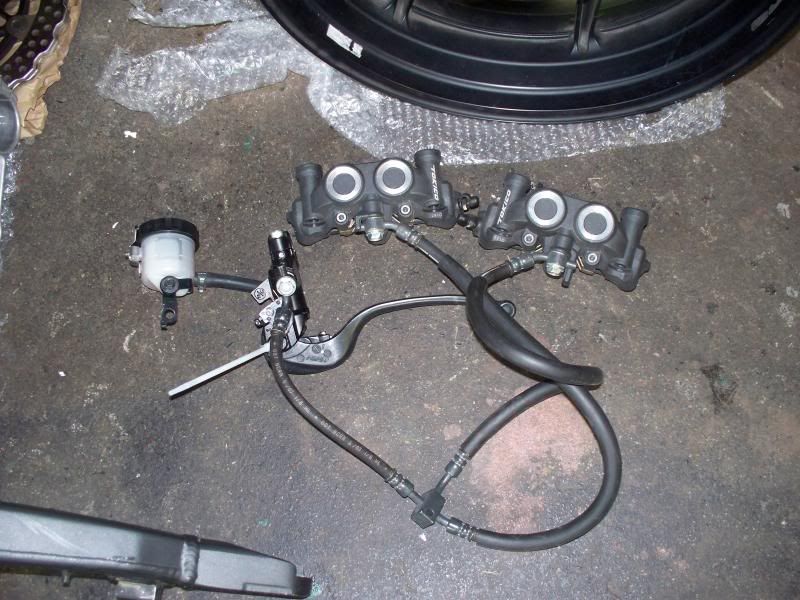
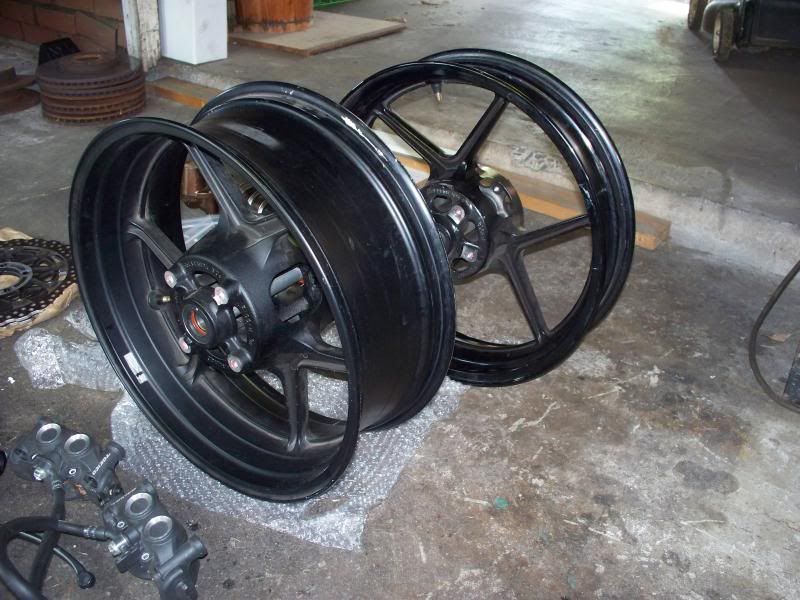
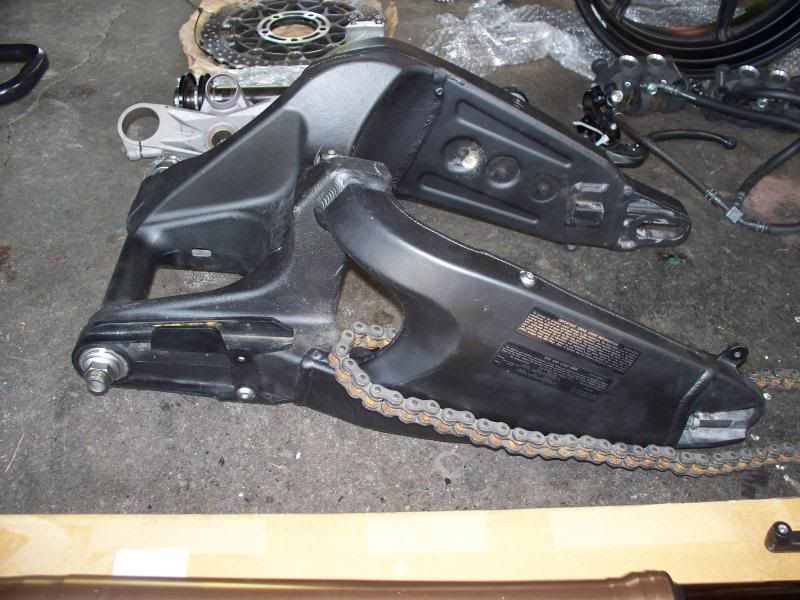
I’ve decided to go with a full gen 3 (2008 – 2010) zx10r suspension front and rear. This will include forks, wheels, swing arm, shock, brakes and rotors (along with the peripherals). My bike will essentially be a 7r from the frame in, and a 10r from the front triple forward, and the swing arm pivot bolt back.

I’ve been collecting the components necessary for the swap (minus any custom spacers/ fab stuff) since early May and have tried to be patient. I got really lucky on a couple finds, and not so lucky on others (had to pay $$$). It all came down to availability and time frame.
Let the fun begin:


Image


Image


Image


Image


Image


Image


Image


Image


Image


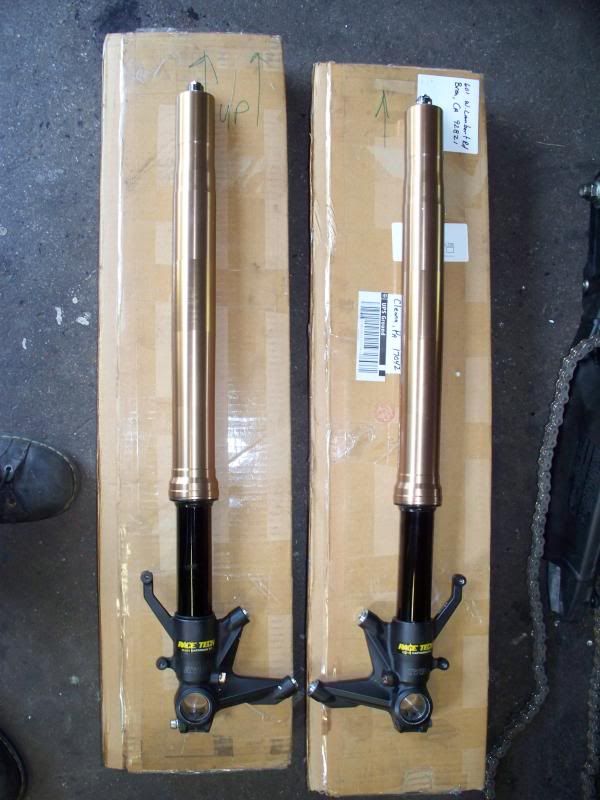
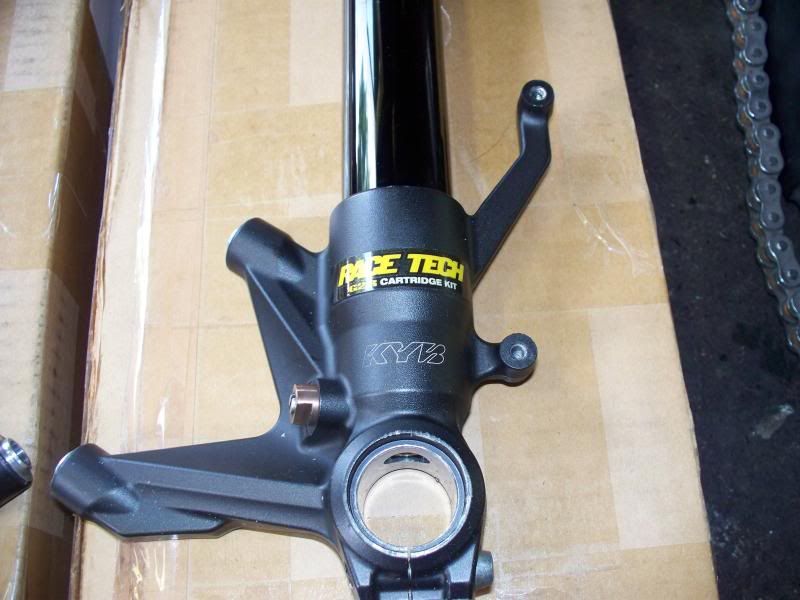
The real kicker: Gen 3 forks with Race Tech G2r cartridge kits already installed. Fresh from Race Tech with zero miles on them. I am unworthy.

Image


Image
 
#49 ·
Both swing arms are out and accounted for. Doing some mock fitting to see what needs to happen here.


After some measuring, debate, and contemplation I've decided to go with the zx10r pivot shaft fitted to work with my 7r. Here's a quick fitment test/example


zx10r swing arm pivot shaft w/hardware: 19 oz. (the 7r pivot shaft weighs in at 28.02 oz.... but who's counting)

I'll need to find a bushing/sleeve for the threaded portion to the left and a spacer or bushing with the exact ID/OD as the one next to the one on the right. Fortunately, both the 7r and 10r swing arms measure exactly the same at the pivot point: 10-1/8"

 
#52 · (Edited)
wow ... never expected that much of a weight difference. thanks.

Is there enough clearance for movement between the swing-arm and the sub-frame on the right hand side?

If you are looking for narrower spacers (less than 1/4" in thickness), Home Depot has large washers with an inner diameter of 25 mm. They slide right on the shaft nicely. They are about 1/16' thick, so you can use a few of them to build-up the thickness you need.
 
#54 ·
Clearance may be an issue at the sub frame on the right hand side under load. I'll have to look into it further once I get everything assembled correctly. I already have a TIG buddy on stand-by and an idea of a way to move thing around a bit to remedy the issue...

Thanks for the tip on the spacers. I was actually just taking some measurements and getting ready to look around online. I'd really like to avoid having to get something custom machined but...
 
#53 ·
Oh wow. I never really weighed my zx6r swingarm because I had just heard that the newer ones were about 5-6lbs lighter. I wonder if there is a huge difference between my 06 zx6r arm and your 08 zx10r.. I bet it weighs even less than I thought it does.
 
#56 ·
Nice work Joe, You will probably have yours back on the road before me the way I am going, Its winter here & with other projects & family I have not done much with mine

Pretty much the same deal though with the conversion
I used the Allballs triple clamp bearings on the ZX10 triples, 05 ZX10 swingarm though fits with no clearance troubles, I fitted the ZX10 shock & used the stock ZXR750/(ZX7) linkage though so it will be interesting to see how it goes with that? I have read people using both so not sure which way to go until I test it out?

For the steering stops I simply fab'd a piece of billet alloy to bolt on under the frame neck where there happens to be 2 conveniently positioned bolt holes, Bolted on with some grade 12.9 bolts
I finally bought & fitted the new custom length ZX10 HEL front brake hoses the other day (Not pictured yet)
I have not even ridden it yet & I can feel the huge weight reduction just wheeling it around, I just need to tidy up some wiring then I can take it for a test ride when I get time, Flat out with work at the moment so it wont be for another week or 2 yet

Will be great to see your conversion finished Joe

 
#57 ·
Pretty much the same deal though with the conversion
I used the Allballs triple clamp bearings on the ZX10 triples, 05 ZX10 swingarm though fits with no clearance troubles, I fitted the ZX10 shock & used the stock ZXR750/(ZX7) linkage though so it will be interesting to see how it goes with that? I have read people using both so not sure which way to go until I test it out?

For the steering stops I simply fab'd a piece of billet alloy to bolt on under the frame neck where there happens to be 2 conveniently positioned bolt holes, Bolted on with some grade 12.9 bolts
I finally bought & fitted the new custom length ZX10 HEL front brake hoses the other day (Not pictured yet)
I have not even ridden it yet & I can feel the huge weight reduction just wheeling it around, I just need to tidy up some wiring then I can take it for a test ride when I get time, Flat out with work at the moment so it wont be for another week or 2 yet

Will be great to see your conversion finished Joe


Beautiful work as usual, Ninjainoz.

I like your idea for the steering stops. I hadn't gotten too far into considering that at this point yet.

I chose the gen3 swing arm for the looks of it. I like the bulkier super-sport look, even with the possibility (likelihood) of having to make sub frame mods. Like I said before, I have a TIG buddy on stand-by and I have a good idea of a pretty simple way of getting things sorted.

Have you done anything with your clip-ons yet? There's a diametric difference between the 7r fork tube and the 10r, obviously, so that creates an issue with clip-on fitment. At this point I'm considering some type of shimming or a spacer. I'd like to keep the 7r clip-ons on but may have to swap them out for a more compatible set as well..
 
#59 ·
#60 ·
Thanks Joe, Yeah I am slowly getting there

This is what I have instead of clip-ons>

Also fitted a set of ZX14 clutch & brake master cylinders, I like how they are symmetrical & they work much better than the older master cylinders
Okay, I see what you've got going on there. More a of a Street Fighter approach. That should look awesome when finished.
 
#67 ·
For comparative purposes, look how awkward my inside wrist looks in this photo with the stock clip-ons

Image
 
#69 ·
Good shot Joel. That's an even better view.
 
#72 ·
Continuing on...


Making spacers to mount the swing arm: starting with the right side.

I found this metal spacer at Lowe's that was pretty close to what I needed.


After careful measurement, cutting, grinding, and sanding, it's ready to go into the swing arm. It's a nice tight slip fit onto the axle and a press fit into the 7r frame. Turned out really well.


Next, on to the left side spacer to make up for the size difference there. There isn't much of a size difference but it's certainly enough that not using some type of a spacer isn't an option. I actually ended up using a steel conduit connector as my starting piece.


Again, after careful cutting, measurement, sanding (repeat) I ended up with a nice tight slip fit on the axle but a press fit into the frame.


Pics with the whole axle fitted up.


Couldn't help myself. Had to throw the swing arm in there and fit the 10r wheel up just for gits and shiggles. :smile


#73 · (Edited)
I'm a little concerned about those spacers.

The swingarm nuts will block them from flying off on the outside but what about the inside?


If you're not planning on going back to stock you might want to sand the surface and use some type of adhesive. Or possibly weld a tab on the inside of the frame in order to prevent it from moving.

Then again, if the swingarm creates a blockage when it's installed it's probably a non-issue. Can you take pic from inside with the swingarm installed.
 
#74 ·
I was concerned with them moving as well, that's why I made them to press fit. They're both literally driven in, requiring a hammer, driver, and quite a bit of force.

The one on the right side couldn't move in even if it wanted to; the swing arm spacer that fits inside the bearing won't let it.

I have an idea for the left side already for "insurance", but these both went in VERY tight (intentionally), I'd be surprised if they moved anywhere.
 
#75 ·
Worked on the front end today. Installed the new tapered roller bearings and seal (All Balls Racing kit).

Apparently, some have been able to use the 10r stem with their suspension conversions. I couldn't seem to get it to work out correctly. Here are the two stems side by side (10r is on the left. 7r on the right).


I kept ending up with too much space below the threads on the 10r stem once everything was pressed together.


The 7r stem pressed into th 10r lower triple seemed to make the most sense so I tried it. Low and behold...


......Fits up great. I just need to make a press-fit spacer for the 6r upper triple to allow it to mate with the 7r stem correctly. Other than that, everything else bolts right up.


Let's not forget today's "brew of the build," Ithica Brewing Co's Flower Power IPA. What a great beer.


http://beeradvocate.com/beer/profile/651/6076


#77 ·
Worked on the front end today. Installed the new tapered roller bearings and seal (All Balls Racing kit).

Apparently, some have been able to use the 10r stem with their suspension conversions. I couldn't seem to get it to work out correctly. Here are the two stems side by side (10r is on the left. 7r on the right).


I kept ending up with too much space below the threads on the 10r stem once everything was pressed together.


The 7r stem pressed into th 10r lower triple seemed to make the most sense so I tried it. Low and behold...


This is what I was most interested in. Awesome!
 
#78 ·
Last spacer that I should have to make. This one fills the gap between the 7r steering stem and the zx6r upper triple.

Unfortunately, Lowe's didn't have anything very close to what I needed in their hardware bins so I had to get a bit radical.


After removing a bunch of material. Grind, measure, repeat. Trying to bring everything in slowly so that everything is uniform and even.


The finished spacer.


Nice slip-fit over the steering stem. Just free enough to slide but zero slop.


Time to press it into the triple. I want a pressed fit so that it will stay as one assembly if I ever have to disassemble anything again.


Pressed in nicely.


All finished up for the day.


#79 ·
Got some parts in today!


New Q2s


Vortex Clip-Ons (took your advice,Turbo)


In other news, the 10r rear shock is mounted. Had to remove about .5mm in order for the 7r linkeage to work.


I used the 7r linkeage with the 10r dogbones (they're aluminum). She's back on the stands again.


For some reason, I forgot to order new grips, so that's on the list. Most of the parts are in, just lots of work to do. Next up, front suspension.
 
#82 ·
Front forks are mounted up, along with my new Vortex clip-ons.


Pic with the ignition installed. I have to admit; that is one part of the build that did not go very smoothly. I think it still needs some work to get the thing to fit and function the way I want it to.


I'll be in the garage today as well. A LOT more work to do!
 
#83 ·
Spent a lot of time today getting the controls mounted and sorting out the details. Had to drill and tap some new mounting points for the clutch and brake reservoirs. Also gave some bits a final shot of paint once things had been worked out.


#84 ·
Remounted the old 7r brake fluid reservoir, the 10r sat too high for me. It was bugging me.


Started fitting up the brakes and then I realized that the seller never included the brake mount bolts... So, off to Lowe's I go with some measurements. I ended up finding some bolts that needed cut and bit and rethreaded but worked.


Problem #1: My 7r brake lines won't reach the 10r calipers correctly. Neither will the stock 10r assembly (unless I missed something). I'm not 100% sure why, you'd think they would work.:headscratch

So, I may end up taking some measurements and ordering some braided SS lines that work.

As of right now I'm still planning on using the original 7r master cylinder and lever. Do any of you know if the 10r master cylinder is any type of upgrade? I'm uncertain of where to even find any info on them.


Problem #2: The swing arm WILL hit the rear brake reservoir line where it goes past the sub frame in its stock location. I'm looking into rerouting it so that it doesn't have to pass by the sub frame in that spot.


#85 ·
zx10r master cylinder from 06+ will be a DEFINITE upgrade, and you should really consider getting a radial master instead of the zx7r axial master. Any modern master cylinder will work, they're all over eBay. You should be able to find one with a lever for just under $100, maybe cheaper if you look long enough.
 
#93 ·
I've got my TIG welder on speed dial. He knows I'll be ready soon.

Funny enough, I can't even push down on the rear of the bike hard enough to make the swing arm hit the sub frame at this time but it's not far off.
 
#96 ·
Rear tire is seated and mounted, along with the rotor, sprocket, and caliper. Sprockets line up perfectly, but the chain guard does not. I'm going to have to do something there.


Here's the amount of clearance between the swing arm and sub frame on the right hand side. 1.5 inches, maybe 2. She's gonna take some work.


zx10r lever and master cylinder is mounted and sorted. Might need a longer reservoir-to-cylinder line though. Not liking the bend. I took all of my brake line measurements tonight and will be putting in an order to have some made to fit (braided stainless steel).


Also started cleaning the front wheel to be painted. It's a bit too shiny to match the rear wheel, so I'll be giving her a shot of paint before mounting and so on.


Lots to do, gents, lots to do!
 
#99 ·
Check out how I mounted my reservoir. Get rid of that extra bracket and mount it solid to the triple clamp. And then use a shorter line.

Image

Great suggestion, Joel. I think I may do just that. That's a nice clean look.