so the orange tint at night isnt really your style eh? well heres 1 option you may consider-its a straightforward procedure and was very effective in blinging my gauges at night.
first of all-the gauge face has layers of paint in the plastic-so to truly get rid of the orange, you might as well just get blank (clear) faces and print your own. if your cheap and want to save time-red is the way to go- all the way.
i was wanting green-but i doubt green and orange make a good mix...so i had a bunch of old red LED's laying around and decided to give it a shot just to see what itd look like-i made a quick rig and then was really happy the way the tach turned out, so i kept going and made 3 seperate "rigs" for each gauge-and a total of 9 led's for the complete system.
quick tips first-
make sure youre using the correct resistor in series with the led's you choose.
if your led is round at the end-chop it with some pliers or a grinder will make quick work of it-the flat surface really helps dissapate the light (thanks to whitehendrix on kawiforums)
make sure you have a soldering iron, hot glue gun, fairly thin gauge wire-and the obvious resistors and leds.
i actually robbed mine out of a 9 bulb light assembly-1 resistor for every 3 bulbs...i just followed the circuit board to find the correct direction of polarity.
now onto wiring up each rig...theres plenty of ways to do wiring-but i think my setup made it easily adjustable (took a few times to get placement right)
i start from the power side and work forward. i dont think resistors care about polarity-but i kept it the same anyways...
so going "in series", the hot wire from the harness ties into the resistor, then the wire FROM the resistor goes to first LED (positive terminal) then i move onto the next led, from the ground terminal of the 1st led i wire it to the + terminal of the 2nd led-and so on with the 3rd, then the last wire ties into the gauge's ground system. tip- the + side is always the smaller part you can see... like this-
![Image]()
see the "dish" part on the right-thats the ground side, the left is positive.
tieing it into the system- you can pull the old bulb's socket out then push the wires forward-out of the socket, and wire into the base of the terminal-then when you pull the wire and terminal back down into the rubber peice, its already insulated-really clean...you can see how the wires go into the original bulb placement here in the pic
sorry, its a lot easier than im making it...just cant get the wording down...heres what i did.
![Image]()
you can see my housing was banged up pretty bad-so swapping LED's couldnt possibly make the assembly any worse... you might be able to see how the bulbs are angled-and held in with hot glue (which is amazing for this job-super simple)
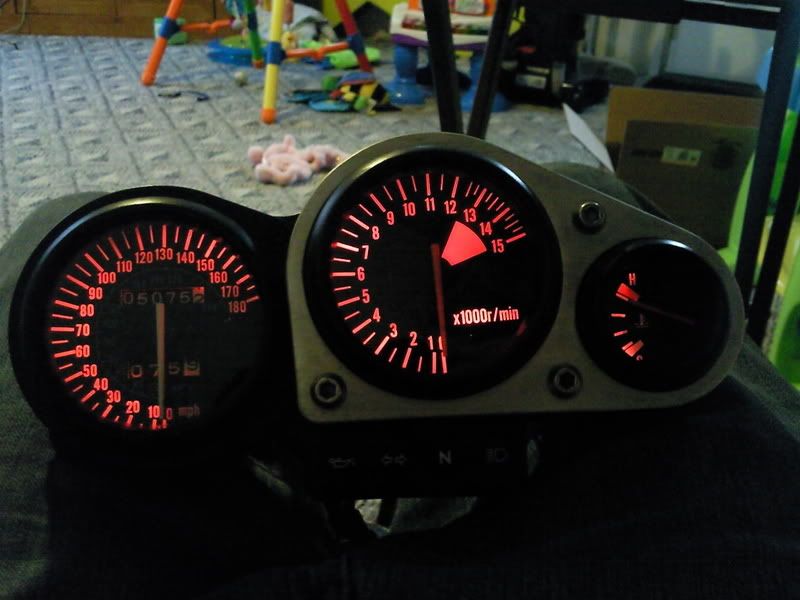
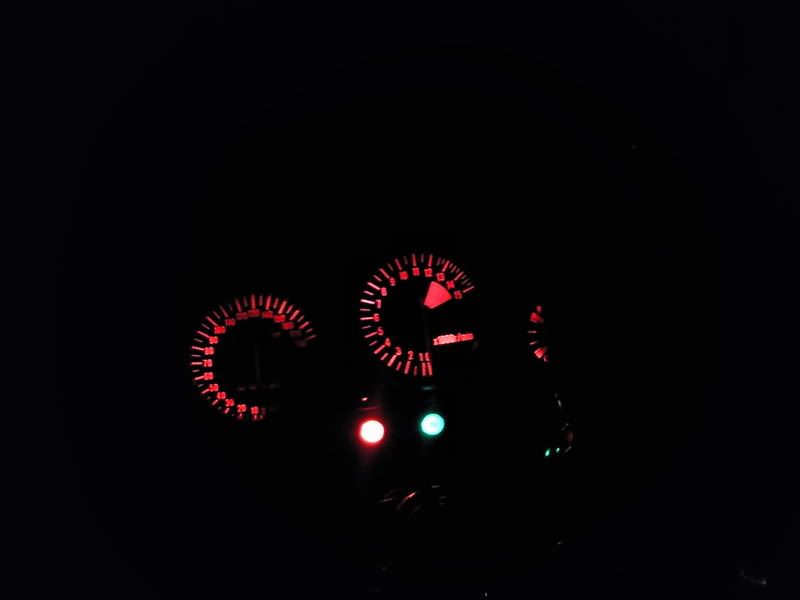
now a comparison
![Image]()
then with the speedo lit up
![Image]()
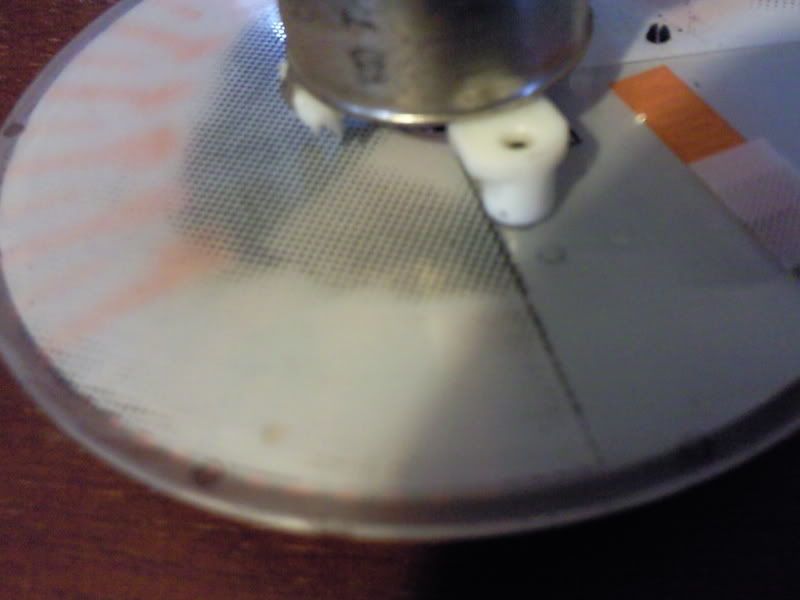
do you see the darker spots around 100mph and 10k on the gauges-well this is because the gauges are designed for bulbs-so they put these printed black dots on the back-i guess to direct light accross the lens?
here they are on the speedo-
![Image]()
and after sanding with 1500 grit on the tach-
![Image]()
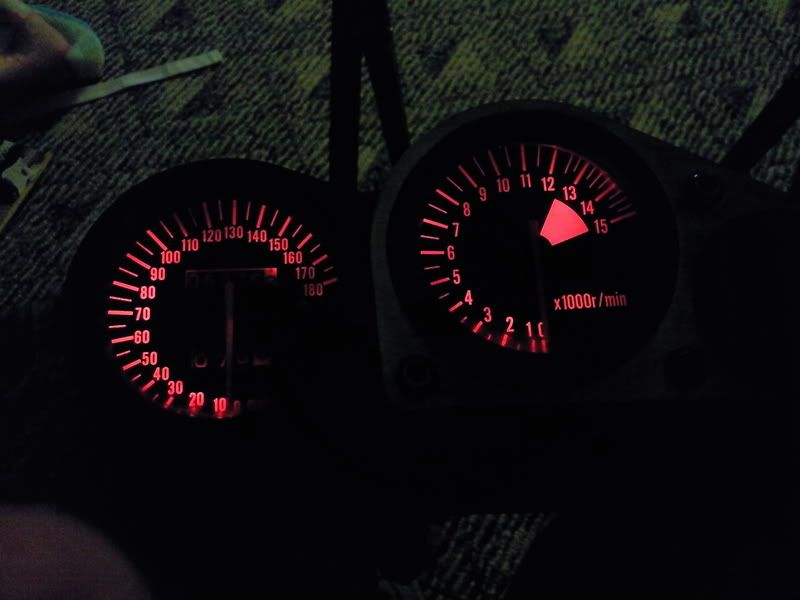
and finally
![Image]()
![Image]()
the pictures do it justice-they dont look like true red-but trust me, theyre beautiful- this is one of the most satisfying mods ive done
first of all-the gauge face has layers of paint in the plastic-so to truly get rid of the orange, you might as well just get blank (clear) faces and print your own. if your cheap and want to save time-red is the way to go- all the way.
i was wanting green-but i doubt green and orange make a good mix...so i had a bunch of old red LED's laying around and decided to give it a shot just to see what itd look like-i made a quick rig and then was really happy the way the tach turned out, so i kept going and made 3 seperate "rigs" for each gauge-and a total of 9 led's for the complete system.
quick tips first-
make sure youre using the correct resistor in series with the led's you choose.
if your led is round at the end-chop it with some pliers or a grinder will make quick work of it-the flat surface really helps dissapate the light (thanks to whitehendrix on kawiforums)
make sure you have a soldering iron, hot glue gun, fairly thin gauge wire-and the obvious resistors and leds.
i actually robbed mine out of a 9 bulb light assembly-1 resistor for every 3 bulbs...i just followed the circuit board to find the correct direction of polarity.
now onto wiring up each rig...theres plenty of ways to do wiring-but i think my setup made it easily adjustable (took a few times to get placement right)
i start from the power side and work forward. i dont think resistors care about polarity-but i kept it the same anyways...
so going "in series", the hot wire from the harness ties into the resistor, then the wire FROM the resistor goes to first LED (positive terminal) then i move onto the next led, from the ground terminal of the 1st led i wire it to the + terminal of the 2nd led-and so on with the 3rd, then the last wire ties into the gauge's ground system. tip- the + side is always the smaller part you can see... like this-

see the "dish" part on the right-thats the ground side, the left is positive.
tieing it into the system- you can pull the old bulb's socket out then push the wires forward-out of the socket, and wire into the base of the terminal-then when you pull the wire and terminal back down into the rubber peice, its already insulated-really clean...you can see how the wires go into the original bulb placement here in the pic
sorry, its a lot easier than im making it...just cant get the wording down...heres what i did.
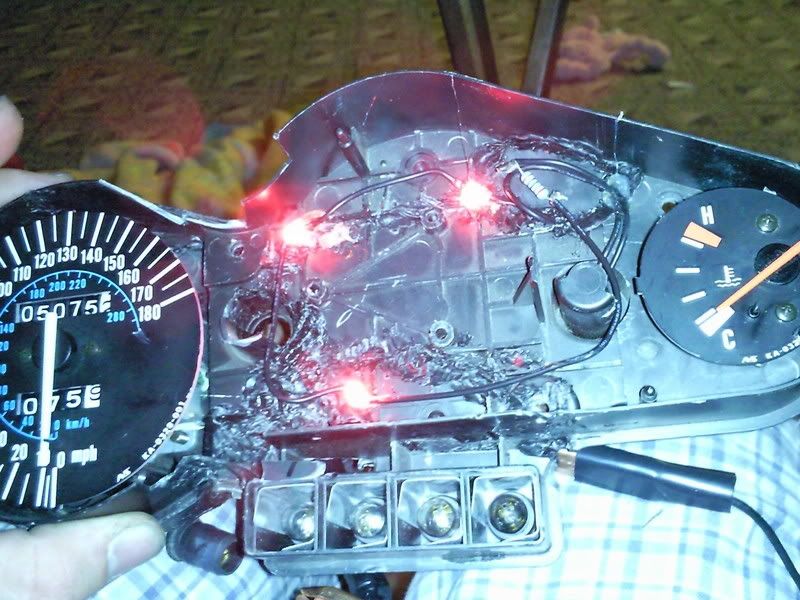
you can see my housing was banged up pretty bad-so swapping LED's couldnt possibly make the assembly any worse... you might be able to see how the bulbs are angled-and held in with hot glue (which is amazing for this job-super simple)
now a comparison
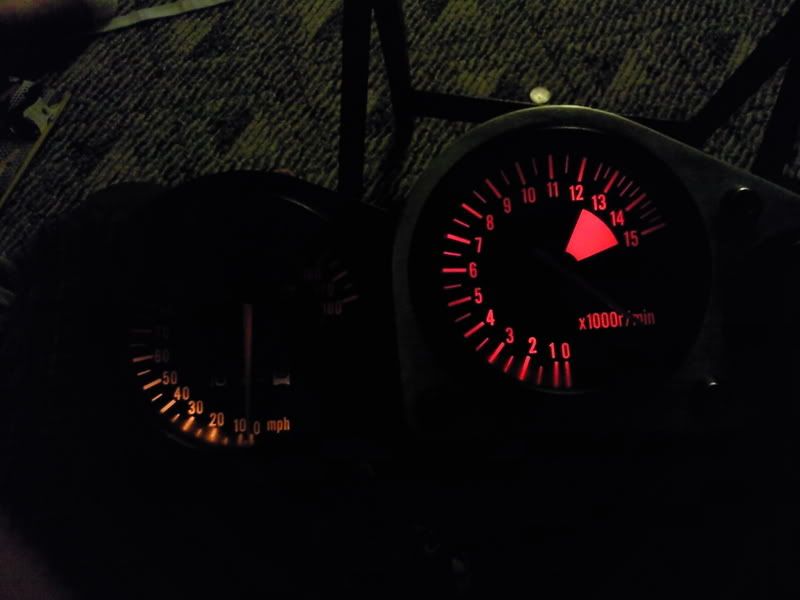
then with the speedo lit up
do you see the darker spots around 100mph and 10k on the gauges-well this is because the gauges are designed for bulbs-so they put these printed black dots on the back-i guess to direct light accross the lens?
here they are on the speedo-

and after sanding with 1500 grit on the tach-
and finally
the pictures do it justice-they dont look like true red-but trust me, theyre beautiful- this is one of the most satisfying mods ive done