Kawasaki Ninja ZX Forum banner

ZX600: Seeking starter clutch installation advice

19K views 5 replies 4 participants last post by  jofa18  
#1 ·
Hello all, I'm new to the forums and had a question regarding my project bike.

I recently acquired a 91 zx600 and am experiencing problems with the starter clutch (for the record it just slips, occasionally turning over for one rotation). I was wondering if anyone has heard of someone being able to replace the starter clutch by going through the bottom of the crank case (oil pan region) as opposed to splitting the case? Apparently it was possible with the KZ550, though I don't know if the engines are similar.

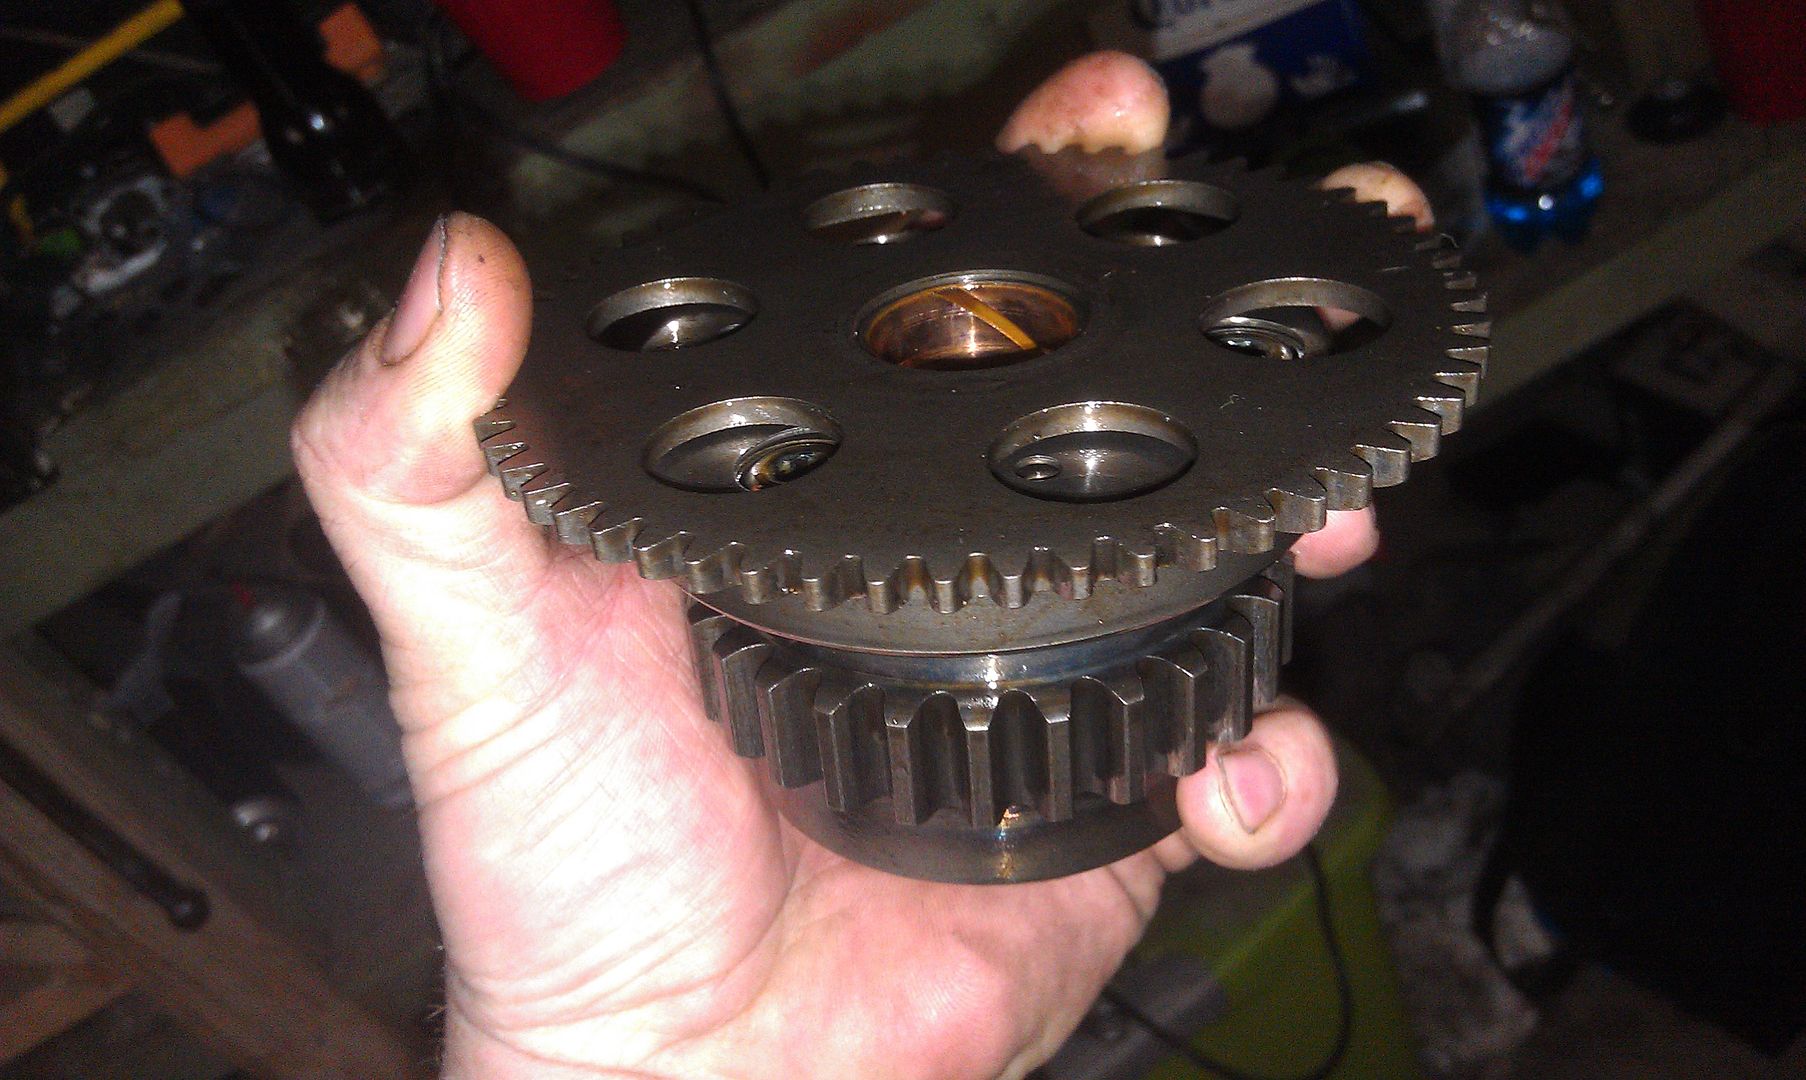
From the photos in the Clymer manual it appears that it might be possible to remove the secondary shaft and then remove the starter clutch through the bottom of the crank case.

If anyone has had any experience with installing starter clutches on these bikes and could share some insight it would be greatly appreciated :smile

Thanks for reading
 
#2 ·
Possible? Indeed

Just in case anyone is wondering about this in the future, yes its is very possible. I recently replaced the starter clutch in my 1991 zx600c this way. Since I looked all over for this information and couldn't find any useful information I'll recount some of the key points of the process.

For the record don't let the idea of replacing the starter clutch be an intimidating one. I honestly have never done anything more than perform an oil change or basic maintenance, so this would have been the most, and it was a very simple procedure lasting about 5 hours (due to trial and error).

I basically did most of the work with a $5 ratchet set from Big Lots :p (closest tool set and it worked fine) however you will also need a ratchet extender, dead blow hammer(or improvise), a set of screw drivers, and I highly recommend either borrowing or renting an impact gun if you don't own one (an electric one works fine) and you will thank yourself when it comes to remove the clutch!

-A side note: you will need a 30mm impact socket if you are using the impact gun to remove the clutch nut-

To start you want to strip the bike down to the point where you are able to remove the oil pan(This is just a quick overview so I assume you have a manual available) The first big hurdle for me (aside from the clutch) was removing the oil pump, its a pain. The screws are staked so any attempt to remove them with a normal hand screw driver would only result in stripped screws. So I used the impact gun with a Philips adapter and that worked nicely. Also you have to remove dowels from the oil pump screw holes, this was even worse than the screws so if you want something to fret over this would be it. :banghead

Once you have the oil pan off, and the oil pump removed you can remove the secondary shaft by hitting the shaft through the case from the water pump side to the clutch side with a dead blow hammer, mine came out with minimal effort. Once it is removed you will be left with the (for lack of the technical term i shall refer to it as the starter clutch sprocket), and the starter clutch. There is a bolt on the front of the crank case that resembles an oil drain bolt, this is actually the crank chain tensioner. With this bolt removed you should be able to move the sprocket and starter clutch enough to remove them.

Now its just a matter of servicing the starter clutch and doing everything you just did in reverse order. In my case I was foolish and ordered a replacement clutch before I had seen the damaged one. What I had envisioned as a twisted mass of fail actually turned out to be two failed springs, slightly longer than the ones found in a "clicky" pen. Needless to say something so small will cause your bike to be next to useless, so if your clutch has the same diagnosis you would be better off paying the $2 per replacement spring as opposed to $40-$60 for a used clutch.

After all the work you should be rewarded with a strong cranking engine, and the best part is you didn't have to remove the engine and split the cases, Yay :mfclap
 
#4 · (Edited)
I'm bumping this cause im about to do the same to my 88 600C. probably gonna take it apart tonight and take alot of pictures and make an entire thread for this project. i did have a few questions, but from what is explained and and the book i have here, i think i can figure it out. But having the stock exhaust on the bike, gonna be a bit more work. I can get all the plastics off the bike front to back in less than 10 minutes now because this will be like the 20th time i have pulled them in the last 3 months. between the CDI dying, troubleshooting that and the coils, fuel issues with the carbs, and everything else. i pretty much got the bodywork down to a science. i dont even remove the morrors or pull the upper fairing apart. leave it all intact and just slide it off the front.
 
#5 ·
Pictures and a rundown of this teardown.

Started by pulling off all the plastics and tank again for the billionth time it seems like.
Image


Exhaust and Rad removed.
Image


After draining the oil, pulling the filter and the pan off, I saw it already.
Image


Another angle of it.
Image


The bolt chain tensioner TheX12 mentioned on the front of the engine case.
Image


Removed the clutch basket and after stripping out 2 of the phillips head screws to the oil pump which are on the side of the case behind the basket(3 screws total, 2 are on a plate on the gear twords the front of the bike, and one is a 10mm hex/phillips.) and having the use a Bolt extractor to get them out, I found the dowls he mentioned, not hard to get backed out and free with a flathead and a few wiggles of the pump to geth them to back out a bit to allow the pump to come free.
Image


After removing the water pump it exposed another nut on this side that i think i used a 1" socket and an impact to remove. then as stated a few light taps and the entire shaft slides out the clutch side.
Image


Heres the other side, bearing came out with it.
Image


With the shaft out and the tensioner bolt removed, it allows the starter clutch assembly to be worked upwards and to the water pump side of the bike allowing you to get the idler gear off of the clutch assembly by moving it over to the transmission clutch side of the bike. So it actullay comes out in 2 pieces, and the little steel barrel things have a tendancy to fall out when this happens, may also drop a decent sized washer out of there as well.
Image


And its out and back in one piece.
Image


A shot with the idler gear off of it so you can see the little barrel things in it, they run inside on a taper so when you spin it one way, they lock up on the idler, but run free in the other direction.
Image


And here are the holes that are supposed to have springs in them to keep tention on the little barrels, and of course they are all trashed, short, and missing a bit off the ends. I'm not sure of there was also something else supposed to be there to keep the springs from poping out but im going to look into it more later.
Image


The rest of the bike that ended up on the shelf in the process of this disaster.
Image


And for the fun of it, a shot of my wiring diagram poster i printed out.
Image